Organiser How-To
Name Badges
Design printable badges for your event and issue one to every delegate or faculty member, automatically filled with their registration details. Design a template once, then reuse it to issue and print in batches — and correct or reprint any badge later.
Where to find it: Open your event → Event Dashboard → Name Badges. You'll see four tiles: Create Template, Templates, Issue Badges, and Issued Badges — Edit / Delete / Print.
Step-by-Step Guide
Create a Template
Click Create Template, give it a name (e.g. Delegate), then choose a badge size. Set a background from the gallery or upload your own. Add your logo, toggle the QR code on if needed, then drag and position each text field (name, specialty, workplace, etc.). Click Create Template to save.
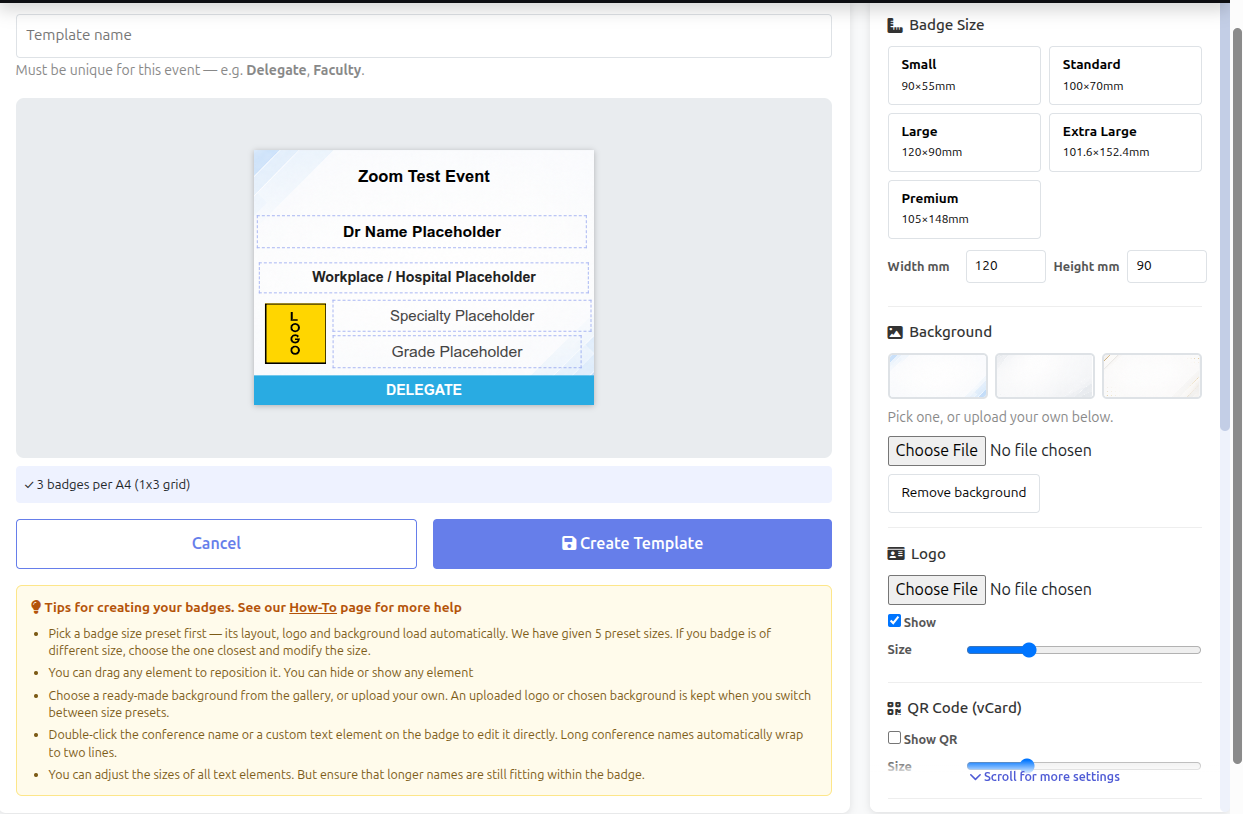
The right-hand panel scrolls — QR and text element controls are below the logo section. Widen a field's width box where no QR code is shown, and check that the longest names still fit.
Edit a Template
Click Templates, find the template card and click Edit. Make your changes and click Save Changes.
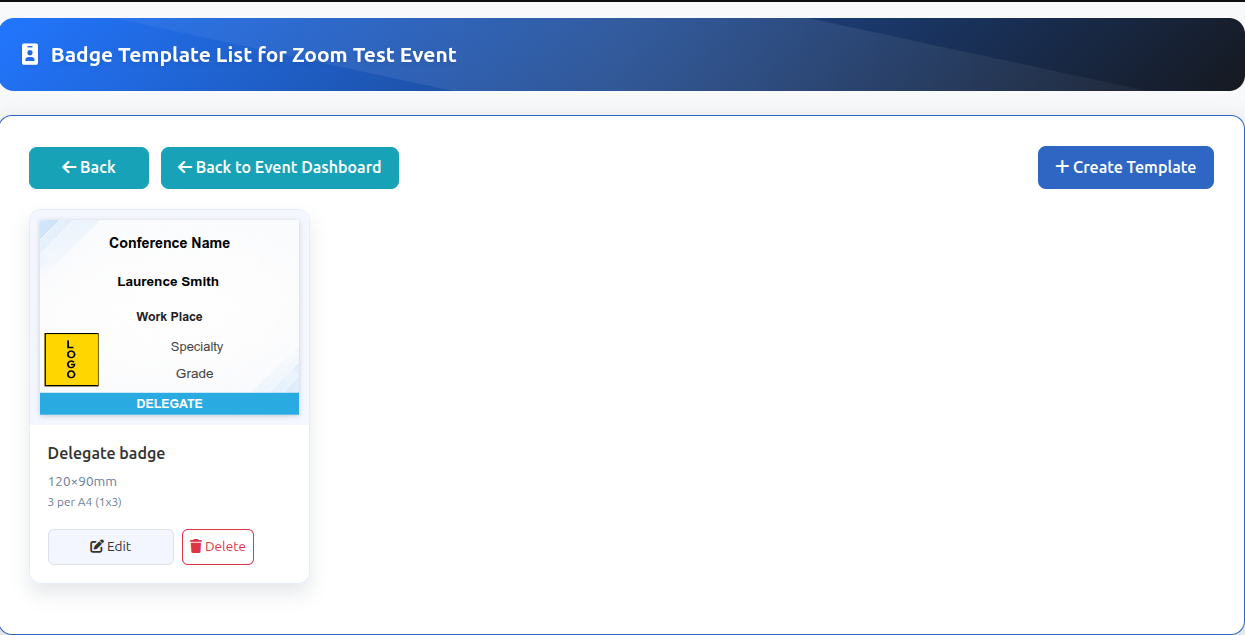
Editing a template changes it for future badges only. Badges you have already issued keep the design they were issued with.
Issue Badges
Click Issue Badges, choose the Delegates or Faculty tab, and pick a template from the dropdown. Tick people from the list — every field is editable before issuing. Click Issue Badges — the selected people are saved as a batch and drop off the not-yet-issued list.
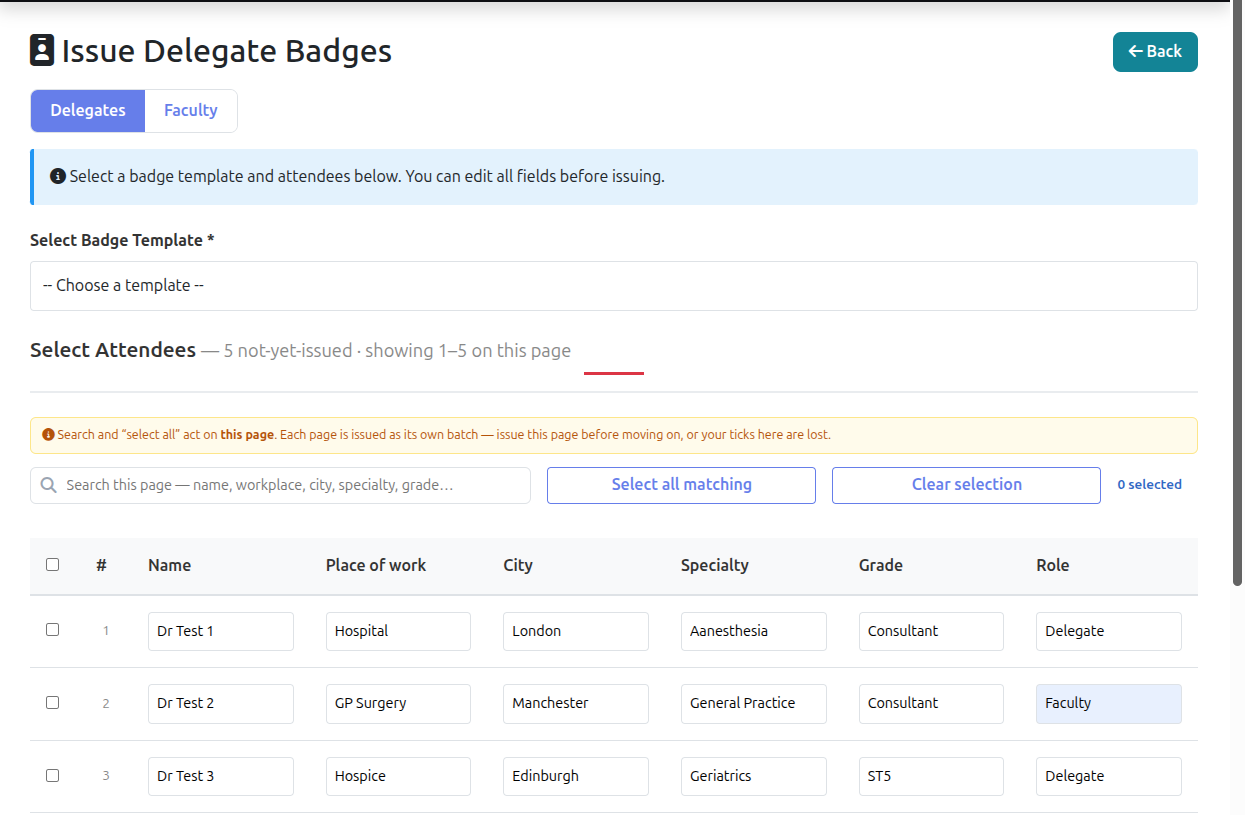
Search and selection apply to the current page only. Issue the page you are on before moving to the next — you will be warned if you try to leave with un-issued selections.
Print Badges
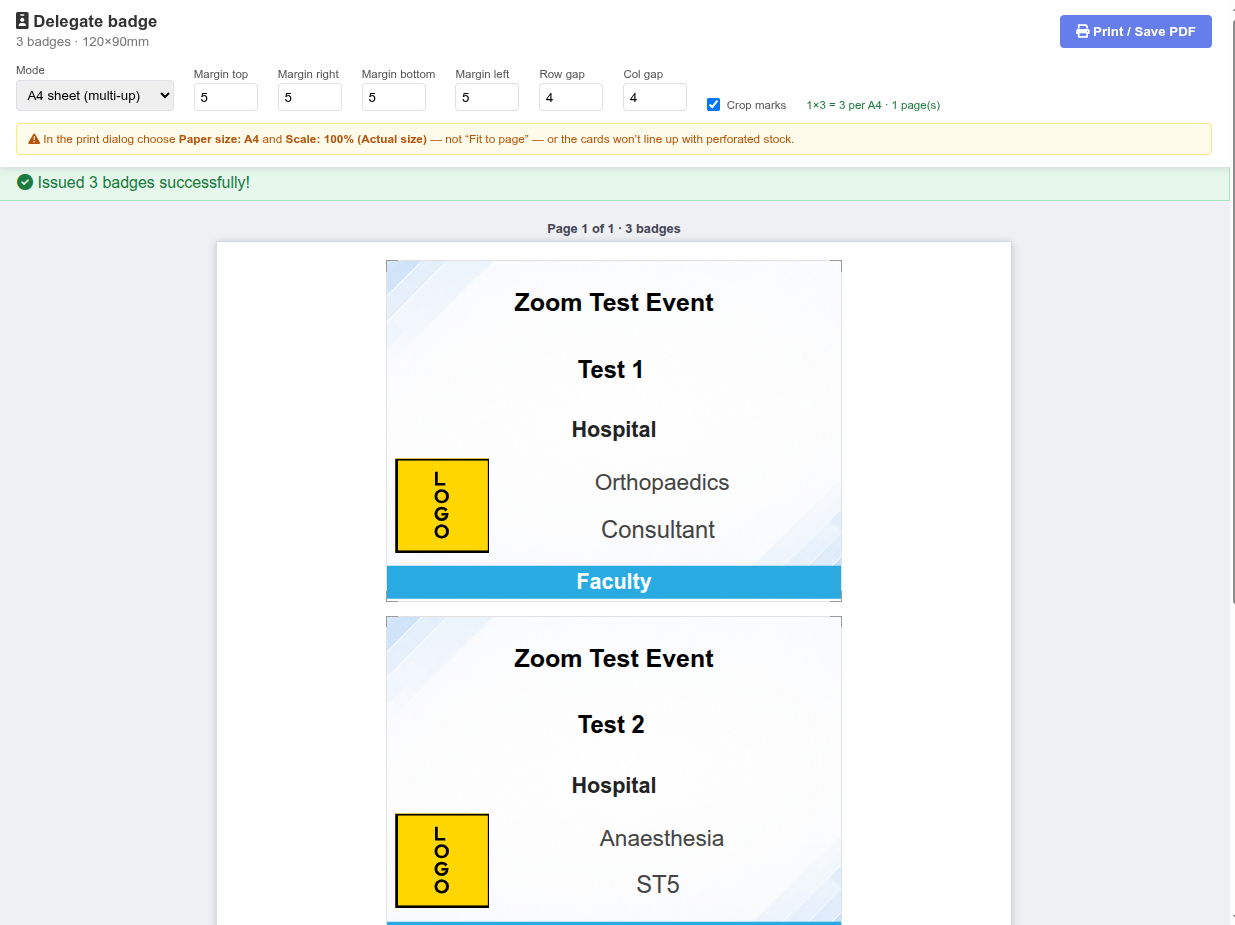
Click Issued Badges — Edit / Delete / Print, select the batch from the dropdown, tick the badges to print, then click Print Selected. Choose your layout mode, margins, gaps, and crop marks to match your perforated stock. In the browser print dialog set paper size to A4 and scale to 100% (Actual size) — not Fit to page — so badges line up with your stock.
Reprint or Correct a Badge
Open Issued Badges — Edit / Delete / Print and select the batch. Search for the person by name.
- To reprint only: tick their row and click Print Selected.
- To correct a detail: edit the field inline, click Save Changes, then tick and click Print Selected.
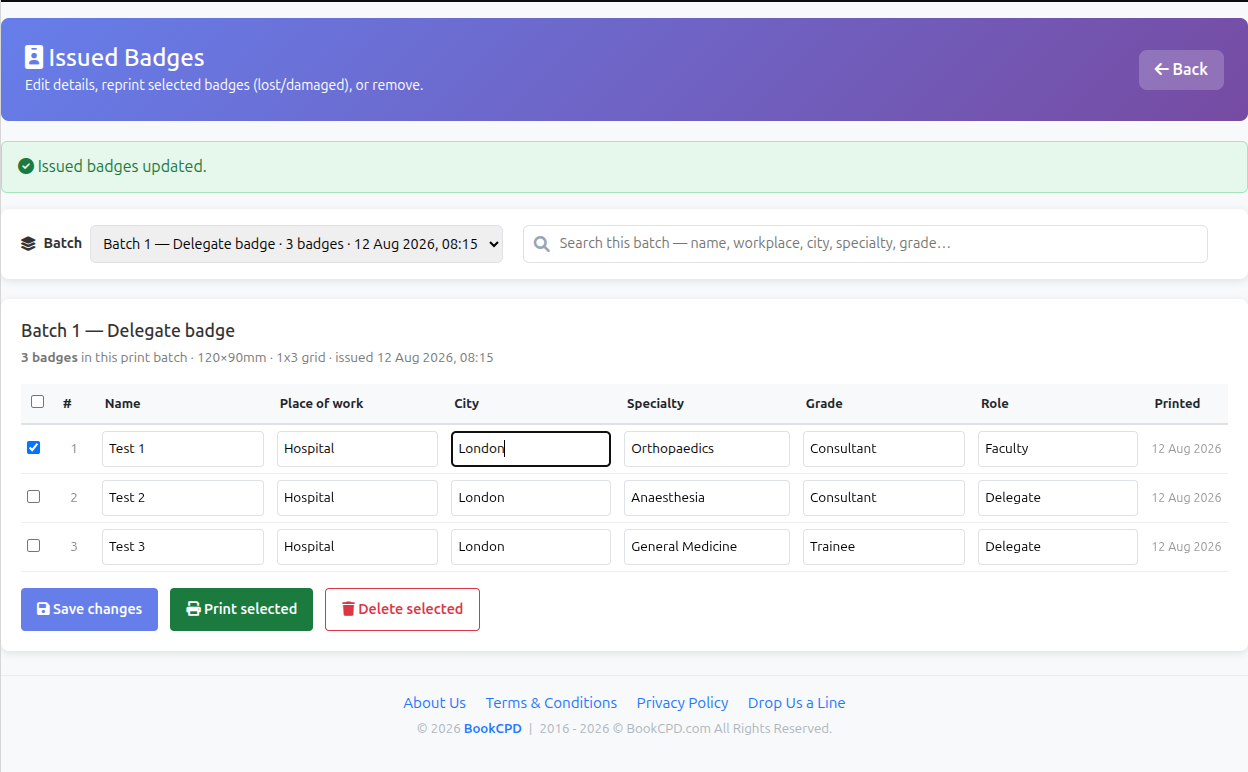
Corrections here affect only that issued badge — no need to re-issue or edit the template. To remove a badge entirely, tick it and use Delete Selected.
Quick Troubleshooting
Text too long or too small on the badge — widen that field's width box in the template, or shorten the text on the issue / edit screen.
Badges spill onto a second page — this is normal. The preview labels each page. Check every page before printing.
No attendees on the issue screen — they may all be issued already, or you have not picked a template yet.
Organiser How-To
How to Prepare and Print BookCPD Badges
BookCPD provides ready-made badge templates for your event, so you don't need to create your own badge design. Simply download the appropriate template, print it on compatible badge paper and place the printed badges into badge holders.
Step-by-Step Guide
Choose Your Badge Size
BookCPD currently recommends two standard badge sizes:
Workshop / Course Badge — 90 × 55 mm
Ideal for:
- Workshops and training courses
- Smaller CPD events
- Faculty and speaker badges
Conference Badge — A6 (105 × 148 mm)
Ideal for:
- Conferences and larger meetings
- Multi-day events
- Badges requiring more space for delegate information, QR codes or sponsor logos
BookCPD also supports custom badge sizes, including 100 × 70 mm and 120 × 90 mm, where required.
Download Your Badge Template
Your badge template is available through your BookCPD organiser dashboard. Select the appropriate badge size for your event and download the template. The template is already formatted for you — you can add or delete fields as required before printing.
Choose Your Printable Badge Sheets
For the best results, we recommend using pre-perforated printable badge sheets.
90 × 55 mm Workshop Badge
The recommended printable sheet is the Avery 90 × 54 mm micro-perforated insert. Note the sheet is 90 × 54 mm — 1 mm shorter than the badge holder — which is intentional and ensures a clean fit.
Avery L4727-20 specifications:
- 90 × 54 mm
- A4 sheets · Micro-perforated · 190 gsm
- 200 inserts / 20 A4 sheets
- Suitable for laser and inkjet printers
A6 / 105 × 148 mm Conference Badge
For A6 badges, look for A6 perforated printable badge sheets or inserts.
Always check that the printable sheet dimensions and perforation layout are compatible with your printer and the BookCPD template before purchasing.
Badge Holders and Lanyards
Once your badges are printed, place them into the appropriate clear badge holders.
90 × 55 mm badge holders
View on Amazon UKA6 badge holders
View on Amazon UKBreakaway lanyards (recommended for conferences and workshops)
View on Amazon UKCustom Badge Sizes
If you require a different badge size, such as 100 × 70 mm or 120 × 90 mm, you can use suitable custom printable or perforated badge sheets.
For custom sizes, always check the sheet dimensions and perforation layout carefully before purchasing to ensure they match your BookCPD badge template.
Printing Your Badges
Before printing the full batch, follow these steps:
- Download your BookCPD badge template
- Load the printable badge sheets into your printer
- Print one test sheet first
- Check that the text, logos and QR codes are correctly aligned
- Make sure your printer is set to 100% / Actual Size — not Fit to Page
- Once happy with the test print, print the remaining badges
- Separate the badges along the perforations and place them into the badge holders
Always test one sheet before printing the complete batch. Printer settings can vary and a test print avoids wasting an entire batch.
QR Code Check-In
You do not need a separate QR code scanner. BookCPD's QR scanning functionality is available directly through your organiser login. At registration, simply use the BookCPD QR Scanner from your organiser dashboard to scan delegates' QR codes and record their attendance.
All you need is:
- A laptop, tablet or mobile device
- An internet connection
- Access to your BookCPD organiser account
No additional QR scanner equipment is required.
Need help?
Contact us at support@bookcpd.com