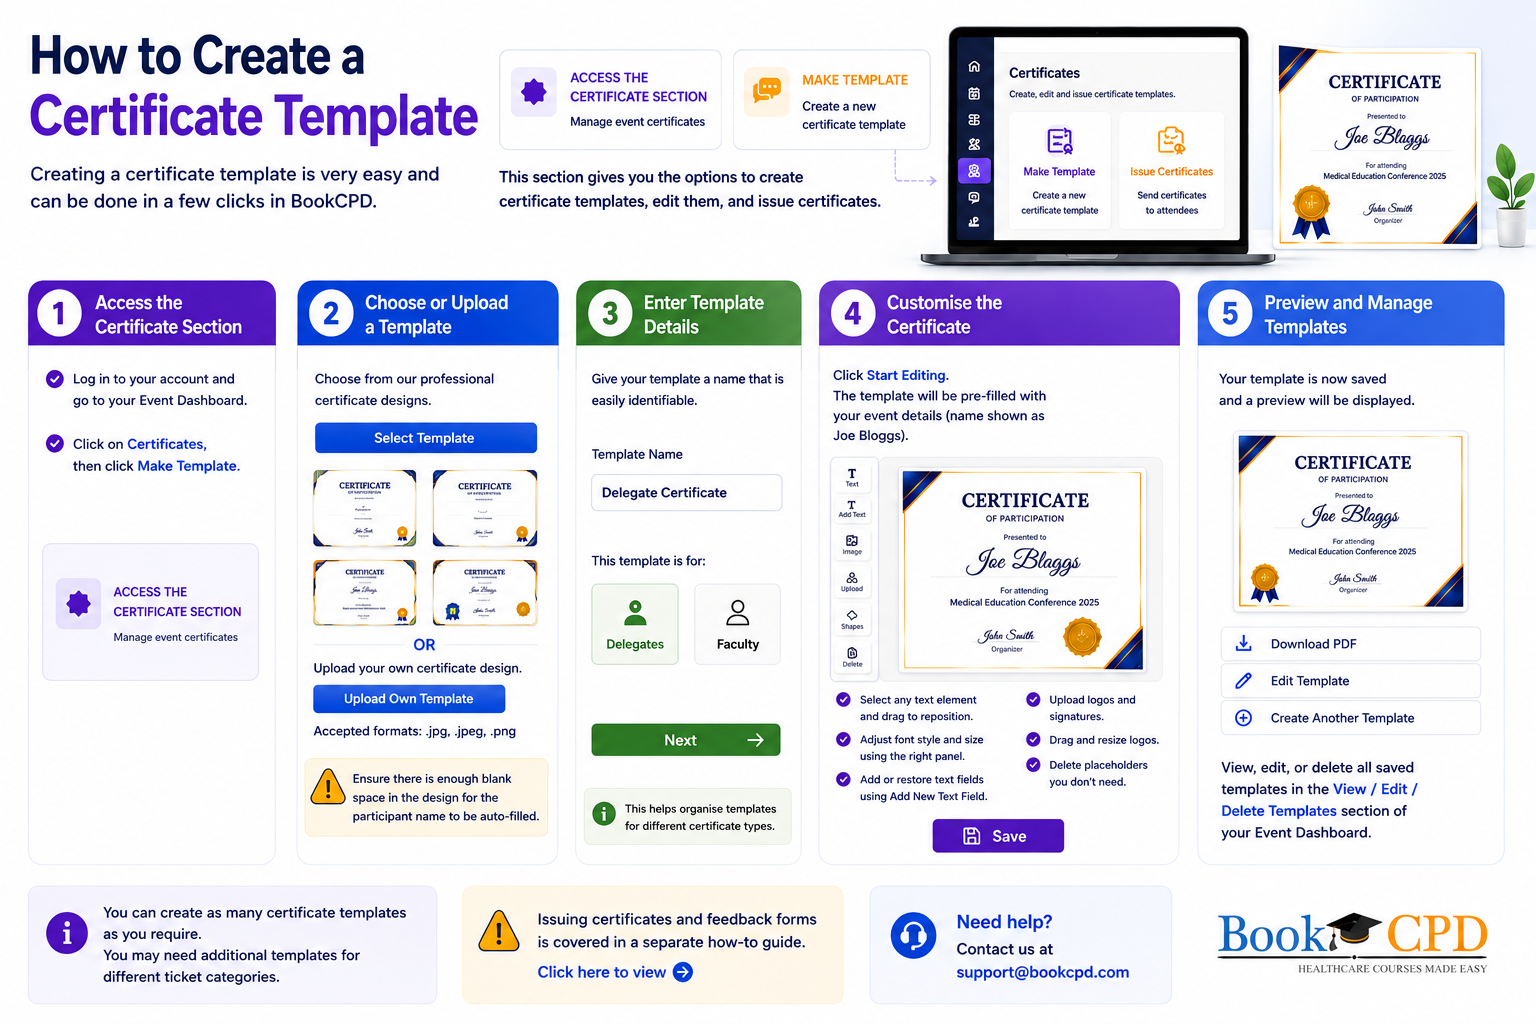
Step 1: Access the Certificate Template Section
Log in to your account and select your event dashboard.
Click on Certificates and then Make Template.

Step 2: Choose or Upload a Template
You will be shown a selection of certificate templates. You can choose a template to your liking.
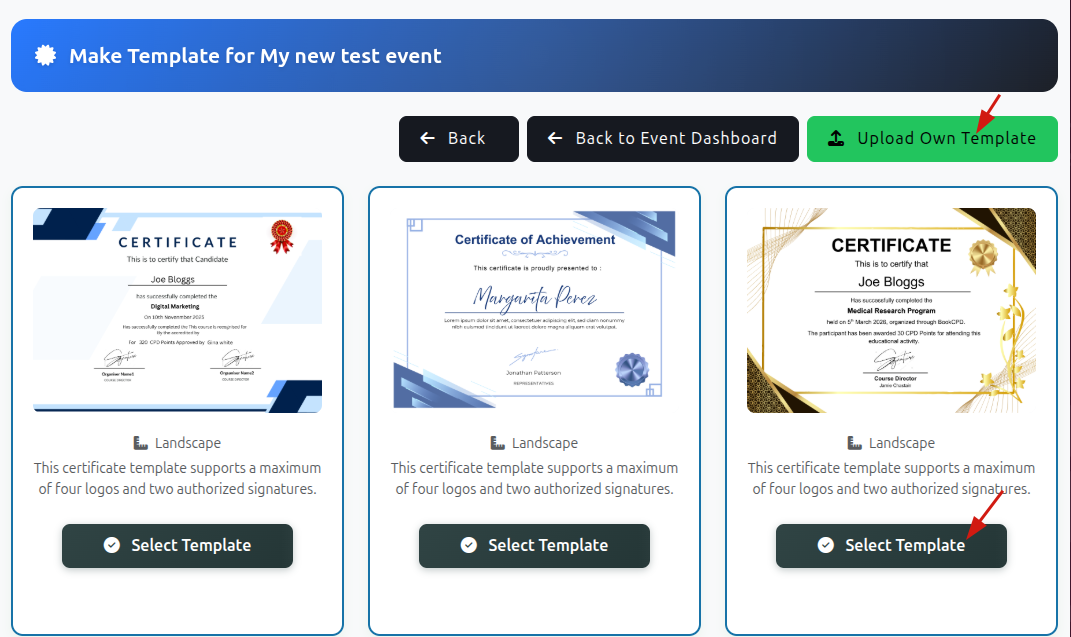
If you already have a certificate designed you can upload your own template. We accept image file in formats:
.jpg.jpeg.png
Please ensure there is enough blank space in the design for the participant name to be auto-filled.
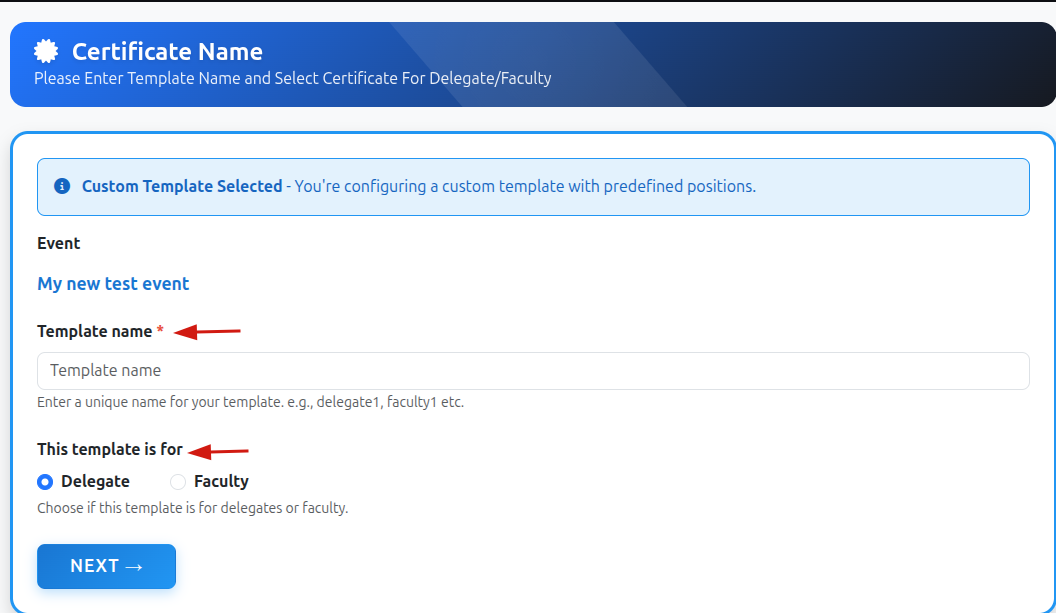
Step 3: Configure Template Details
Give the template a name that is easily identifiable.
Then choose whether the template is intended for:
- Delegates
- Faculty
This helps organise templates for different certificate types.
Step 4: Customise the Certificate
In the next step, you can customise the template by:
- Uploading logos
- Adding signatures
- Inserting text content
You can also:
- Adjust font style and size on the right side panel.
- Reposition elements by dragging them across the canvas
- Delete place holders
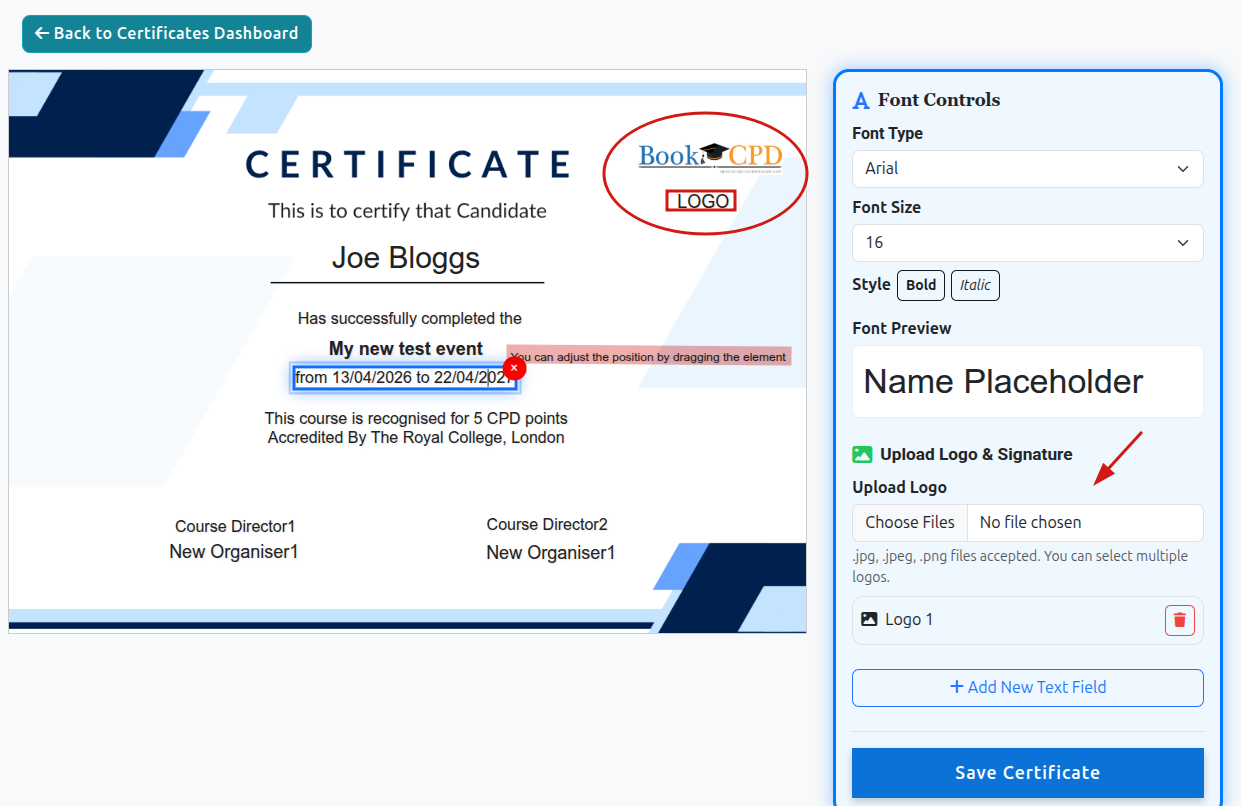
Once you are satisfied with the design, click Save.
Step 5: Preview and Manage Templates
Your template is now saved and a preview will be displayed.
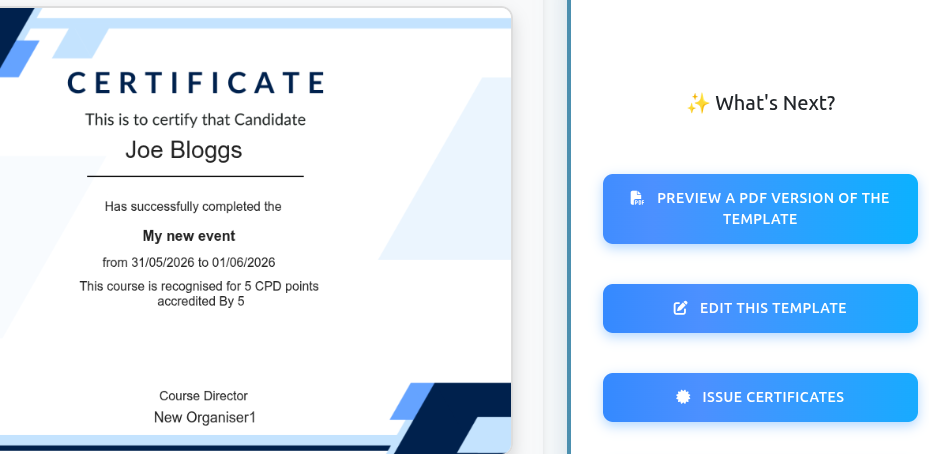
From this screen, you can:
- Download a preview version as PDF
- Continue editing the template
- Create additional templates
You can view all saved templates in the VIEW / EDIT / DELETE Templates section under your event dashboard. 
Next Steps
Now that your certificate template has been created, read our guides on:
- How to issue feedback forms and certificates
These guides will help you complete the setup and automate certificate distribution for your event.